Dummy Dome Camera Installation: A Comprehensive Guide for Effective Surveillance
Outdoor dummy dome camera installation is a cost-effective way to boost security by simulating real…….
Outdoor dummy dome camera installation is a cost-effective way to boost security by simulating real CCTV surveillance. Key steps involve selecting visible locations like rooftops or windowsills, adhering to local regulations, and strategically mounting the camera with proper hardware. Following the Dummy Dome Camera Installation Guide ensures optimal placement for maximum deterrent effect. Regular cleaning and testing battery life maintain their effectiveness without significant investment.
“Elevate your home or business security with outdoor dummy CCTV deterrent lights—an innovative, cost-effective solution. This comprehensive guide delves into the world of dummy dome camera installation, offering a detailed Understanding Outdoor Dummy CCTV Deterrent Lights. From choosing the ideal location for optimal coverage to a step-by-step setup process, we provide essential tips. Learn how these cameras enhance security and discover maintenance tricks for continuous protection. Get ready to transform your surveillance system with our Dummy Dome Camera Installation Guide.”
- Understanding Outdoor Dummy CCTV Deterrent Lights
- Choosing the Right Location for Dome Camera Installation
- Step-by-Step Guide to Dummy Dome Camera Setup
- Benefits and Maintenance Tips for Effective Surveillance
Understanding Outdoor Dummy CCTV Deterrent Lights
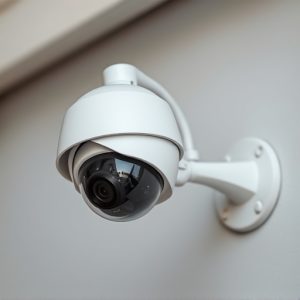
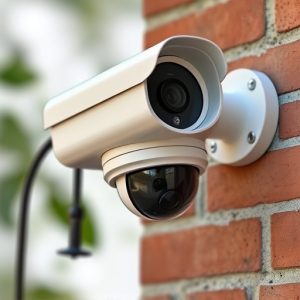
Outdoor dummy CCTV deterrent lights are a clever and cost-effective way to enhance security while deterring potential intruders. These lights mimic the appearance of real surveillance cameras, often featuring a bright LED light source and a dome-shaped design. By strategically placing them in visible areas, you create an illusion of constant monitoring, significantly reducing the likelihood of crime or unwanted activities.
The dummy dome camera installation guide typically involves simple steps to ensure maximum effectiveness. Mounting these devices on walls, fences, or other structures provides a clear line of sight, making them highly visible deterrents. Their design and positioning should align with real CCTV cameras for authenticity, allowing them to blend seamlessly into security setups while offering a powerful psychological deterrent.
Choosing the Right Location for Dome Camera Installation
When setting up a Dummy Dome Camera, selecting the optimal location is half the battle won. The ideal spot offers clear visibility and covers potential blind spots around your property. Ideally, it should be positioned high enough to observe a wide area but not so elevated that it becomes obvious, as you want to deter potential intruders without drawing attention. Consider locations like rooftops, balconies, or even strategically placed windowsills—any place that provides an unobstructed view of the surroundings.
In the Dummy Dome Camera Installation Guide, remember to choose a location with adequate lighting. Not only will this enhance the camera’s image quality but also act as a psychological deterrent. Bright lights can often serve as a strong deterrent, making would-be intruders think twice before attempting any unauthorized entry.
Step-by-Step Guide to Dummy Dome Camera Setup
Setting up a Dummy Dome Camera is a straightforward process that can significantly enhance your home or business security. Here’s a step-by-step guide to help you get started with your Dummy Dome Camera Installation Guide:
1. Choose the Ideal Location: Select a spot where you want to install the camera, ensuring it offers a clear view of the area you wish to monitor. Consider factors like lighting, proximity to potential entry points, and the camera’s field of vision. Mounting it on a wall or pole is common, but ensure it complies with local regulations.
2. Prepare the Surface: Clean the mounting surface thoroughly. If it’s a wall, ensure there are no obstructions that could interfere with the camera’s function. Use appropriate hardware and brackets to secure the dummy dome camera firmly, following manufacturer instructions for the best results.
3. Connect the Camera: Plug in the power cable and connect the camera to your network. Configure the settings on the accompanying software or app to match your security system requirements. This may include setting up motion sensors, recording schedules, and cloud storage options.
4. Test and Position: Once connected, test the camera’s functionality. Adjust its position until you achieve optimal viewing angles. Ensure it captures clear footage during both day and night conditions, making adjustments to sensitivity settings if needed.
Benefits and Maintenance Tips for Effective Surveillance
Outdoor dummy CCTV deterrent lights offer a cost-effective and visually striking way to enhance home security. One of their key advantages is the deterrence factor; potential intruders are less likely to target properties with visible surveillance equipment. These dummy cameras, often in the form of dome-shaped replicas, provide a simple yet effective installation guide for anyone looking to boost their outdoor security. By strategically placing them in visible areas, you create an illusion of advanced security systems, acting as a powerful deterrent.
Maintenance is relatively straightforward; regular cleaning ensures optimal performance. Dust and debris can affect image quality, so periodic wiping down of the camera’s lens and housing is recommended. Additionally, testing the lights’ functionality, including battery life (for wireless models), will guarantee they remain effective deterrents. Remember, a well-maintained dummy dome camera installation can significantly contribute to overall security without breaking the bank.
Outdoor dummy CCTV deterrent lights offer a cost-effective and subtle way to enhance security. By understanding their functionality, selecting the right location, and following a simple setup guide (as outlined in this Dummy Dome Camera Installation Guide), you can create an effective surveillance system. Regular maintenance ensures optimal performance, making these lights a valuable addition to any property’s security arsenal.