Dummy dome cameras provide an affordable security solution for homes and businesses, acting as psychological deterrents against intruders. Selecting one involves considering factors like resolution, night vision, and weather resistance. The Dummy Dome Camera Installation Guide ensures optimal placement for clear footage, enhancing both security and visual appeal without breaking the bank. Easy setup includes mounting, networking, and configuration, while regular cleaning and strategic positioning maintain their deterrent effect.
“Uncover the power of affordable home security with our guide to dummy dome camera installation. Learn how these realistic, yet cost-effective devices can enhance your property’s safety and deter potential intruders. We’ll walk you through the process of selecting the perfect dummy dome camera for your needs, provide an easy-to-follow installation guide, and share maintenance tips to ensure optimal performance. No more breaking the bank for top-tier security – protect your space smartly and affordably.”
- Understanding Dummy Security Cameras: Their Role and Benefits
- Choosing the Right Dummy Dome Camera for Your Needs
- Step-by-Step Guide to Dummy Dome Camera Installation
- Maintenance and Tips for Keeping Your Dummy Cameras Effective
Understanding Dummy Security Cameras: Their Role and Benefits
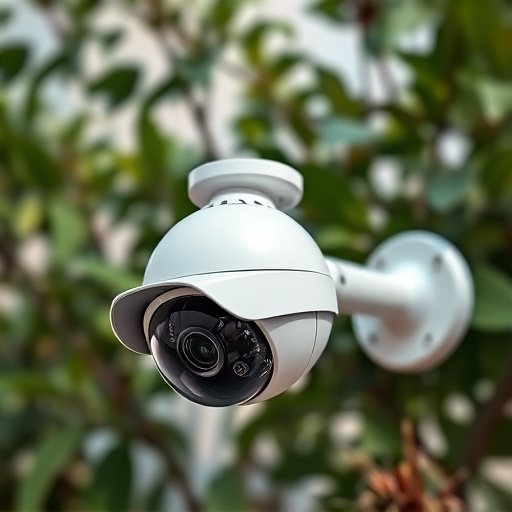
Dummy security cameras, also known as mock or fake surveillance cameras, are a cost-effective and practical solution for enhancing home or business security without breaking the bank. These devices play a crucial role in deterring potential intruders as they mimic real security equipment, creating the illusion of advanced monitoring systems. By strategically placing dummy dome cameras, property owners can create an impression of heightened security, often discouraging unwanted visitors.
The benefits extend beyond psychological deterrence. Dummy cam installations can serve as a valuable guide for genuine security camera placement, helping individuals and businesses develop an effective surveillance system. Many models are designed to blend seamlessly with real cameras, making them an essential tool in the DIY security setup process. A dummy dome camera installation guide can assist users in learning how to position these devices at optimal angles, ensuring they function as intended while remaining undetectable to casual observers.
Choosing the Right Dummy Dome Camera for Your Needs
When selecting a dummy dome camera, understanding your specific security needs is key. These cameras simulate real surveillance equipment, making them an excellent choice for deterring potential intruders without breaking the bank. The right model will blend seamlessly into your environment, providing peace of mind without compromising aesthetics.
Consider factors like resolution (HD or higher for clear footage), night vision capabilities (infrared LEDs for low-light conditions), and weather resistance (important for outdoor installations). A detailed Dummy Dome Camera Installation Guide can help you choose the right angle and positioning for optimal coverage. With these considerations in mind, you’ll find an affordable solution that meets both your security and visual requirements.
Step-by-Step Guide to Dummy Dome Camera Installation
Setting up a dummy dome camera is a straightforward process, offering a simple and cost-effective way to enhance your home or business security. Here’s a step-by-step guide to help you get started with your Dummy Dome Camera Installation:
1. Select the ideal location: Choose a spot where the camera can have a clear view of the area you want to monitor, ensuring adequate lighting for optimal picture quality. Ensure it’s within range of your Wi-Fi network for seamless connectivity.
2. Mount the camera: Securely attach the dummy dome camera to a wall or ceiling using the included mounting hardware. Adjust the camera’s angle until you achieve the desired field of view.
3. Connect and power on: Link the camera to your router using an Ethernet cable (for stable connectivity) or set it up with your Wi-Fi network following the on-screen instructions provided by the manufacturer. Once connected, power on the device.
4. Configure settings: Access the camera’s app or software via your smartphone or computer. Adjust settings like resolution, motion detection sensitivity, and recording preferences according to your needs.
5. Test functionality: Check all functions, including live video streaming, motion alerts, and recording capabilities, to ensure smooth operation. Verify that the camera feeds are clear and provide adequate coverage.
Maintenance and Tips for Keeping Your Dummy Cameras Effective
Maintaining dummy security cameras is a straightforward process that ensures their effectiveness in deterring potential intruders. Since these are non-functional, regular testing and inspection are not necessary. However, keeping them in good visual condition is essential to maintain their deterrent value. A simple cleaning routine with a soft cloth and mild detergent can help remove dust and debris, restoring their appearance.
For optimal results, consider positioning the cameras in strategic locations where they have a clear view of entry points. Regularly check for any physical damage or obstruction that might block their line of sight. Additionally, ensure the camera’s power source is reliable, as a constant power supply is crucial for maintaining their presence as a visual deterrent. Following a simple Dummy Dome Camera Installation Guide and basic maintenance tips will help keep these cameras serving their purpose effectively.
Dummy dome cameras offer an affordable, non-intrusive security solution for homes and businesses. By understanding their role and benefits, choosing the right model, and following a simple installation guide (like our step-by-step Dummy Dome Camera Installation guide), you can easily enhance your security without breaking the bank. Regular maintenance ensures they remain effective, providing peace of mind and better protection.