Homeowners seeking enhanced security can deploy Dummy Dome Cameras as deterrents without live video recording. Following a Dummy Dome Camera Installation Guide ensures optimal placement for maximum effectiveness, considering visibility from entry points, windows, and doors. These cameras offer discreet design, high-definition video quality, motion detection, and night vision. A simple six-step installation process involves selecting a strategic location, mounting the camera, connecting cables, configuring settings, and fine-tuning positioning to boost home security without attracting unwanted attention.
“Enhance your home security with the power of dummy dome cameras – an effective, yet subtle, deterrent against potential intruders. This comprehensive guide delves into the world of these surveillance devices, offering insights on their role in modern home protection. From understanding the technology to selecting the perfect fit for your space, we provide a detailed Dummy Dome Camera Installation Guide. Learn how these cameras can transform your property’s security posture without compromising aesthetics.”
- Understanding Dummy Dome Cameras: Their Role in Home Security
- Choosing the Right Dummy Camera for Your Needs
- Step-by-Step Guide to Dummy Dome Camera Installation
Understanding Dummy Dome Cameras: Their Role in Home Security
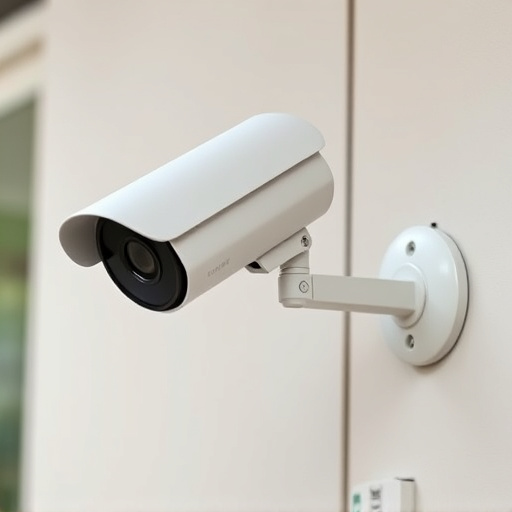
Dummy Dome Cameras are a popular choice for homeowners looking to enhance their home security. These cameras mimic real security cameras, often with a clear dome-shaped housing, but do not record video or transmit live feeds. Instead, they serve as a powerful visual deterrent, acting as a signal to potential intruders that your property is under surveillance. By strategically placing these dummy cameras around your home, you create an illusion of heightened security, making it less likely for burglars to target your property.
A Dummy Dome Camera Installation Guide can help you place these devices effectively. It involves considering factors like visibility from entry points, proximity to windows and doors, and the camera’s line of sight without obstructions. Following a guide ensures that each camera is positioned optimally, maximizing its deterrent effect. Remember, even though these cameras do not record, their mere presence can significantly contribute to a safer home environment.
Choosing the Right Dummy Camera for Your Needs
When selecting a dummy camera for home security, consider your specific needs and installation preferences. Dummy dome cameras are a popular choice due to their sleek design and realistic appearance, easily blending into your environment. Look for features like high-definition video quality, motion detection, and night vision to ensure comprehensive surveillance.
For an effective Dummy Dome Camera Installation Guide, position the camera in a strategic location with clear line-of-sight access to areas you wish to monitor. Ensure adequate lighting for optimal image capture during nighttime hours. Many models offer remote access via smartphone apps, allowing you to view live feeds and receive alerts from anywhere, enhancing your peace of mind.
Step-by-Step Guide to Dummy Dome Camera Installation
Installing a dummy dome camera is a straightforward process that can significantly enhance your home security. Here’s a step-by-step guide to help you through the process:
1. Select the Ideal Location: Choose a strategic spot for your dummy dome camera, preferably close to entry points like doors or windows. Ensure it’s visible enough to deter potential intruders without obstructing any essential views.
2. Prepare the Mounting Surface: Clean and prepare the area where you plan to install the camera. Make sure the surface is smooth and free from debris to ensure a secure attachment. Some cameras come with adhesive backing, while others require screws or brackets for mounting.
3. Attach the Camera: Follow the manufacturer’s instructions to securely attach your dummy dome camera to the chosen surface. If using adhesive, apply it thoroughly and allow it to set before moving on. For screw-on mounts, use the appropriate hardware and ensure the camera is level.
4. Connect Power and Data: Plug in the camera’s power cable and connect it to a nearby power source. Some advanced models may also require an Ethernet cable for data connectivity, ensuring smoother video transmission and potential remote access through your home network.
5. Configure Settings: Access the camera’s mobile app or software to adjust settings like resolution, motion detection sensitivity, and notification preferences. Ensure you have a stable internet connection for seamless operation.
6. Test and Positioning Fine-Tuning: Once installed, test the camera’s functionality, including its audio capabilities if equipped with a microphone. Adjust the positioning if needed to capture clear footage of entry points without drawing too much attention.
A Dummy Dome Camera Installation Guide is an invaluable resource for enhancing your home security. By understanding these cameras’ role and choosing the right fit, you can create a robust surveillance system. The installation process is straightforward, allowing you to monitor your property effectively while adding a layer of peace of mind. Equip yourself with the knowledge to transform your home’s security and rest easy knowing your space is protected.