Weatherproof Dummy Dome Camera Installation: A Comprehensive Guide for Business Security
Weatherproof fake cameras, or dummy dome cameras, offer businesses an affordable security boost. Thi…….
Weatherproof fake cameras, or dummy dome cameras, offer businesses an affordable security boost. This installation guide focuses on strategically placing these realistic devices in visible areas for both deterrence and aesthetic appeal. By choosing features tailored to your environment and following a straightforward installation process, you can enhance surveillance while maintaining a sleek look. The Dummy Dome Camera Installation Guide walks you through selecting the right camera, preparing the mounting surface, attaching the camera, and testing its functionality for optimal performance.
Enhance your business security with weatherproof fake cameras—an innovative, cost-effective solution for deterring crime and boosting peace of mind. This comprehensive guide delves into the world of dummy dome cameras, helping you choose the perfect fit for your setup. Learn how to install these realistic looking devices effectively, ensuring maximum protection against unwanted intruders. Get started with our step-by-step Dummy Dome Camera Installation Guide today!
- Understanding Weatherproof Fake Cameras for Business Security
- Choosing the Right Dummy Dome Camera for Your Setup
- Step-by-Step Guide to Install Weatherproof Fake Cameras
Understanding Weatherproof Fake Cameras for Business Security
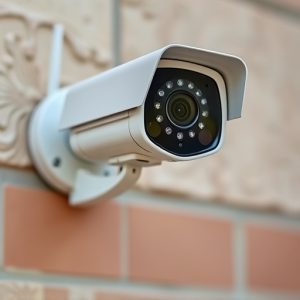
Weatherproof fake cameras, or dummy dome cameras, are an innovative security solution for businesses looking to enhance their surveillance systems. These realistic-looking cameras offer a cost-effective alternative to real security equipment while still providing the benefits of improved security and potential crime deterrence.
When considering weatherproof fake camera installation, it’s essential to understand that these devices are designed to mimic genuine surveillance equipment, often with detailed designs and LED indicators that appear functional. This installation guide typically involves strategically placing the dummy dome cameras in visible areas, ensuring they blend seamlessly into the environment while still offering a clear line of sight for potential intruders.
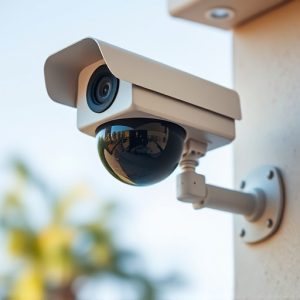
Choosing the Right Dummy Dome Camera for Your Setup
When selecting a weatherproof fake camera for your business, understanding your setup is key. The Dummy Dome Camera Installation Guide should be your first step. Different environments demand specific features. For instance, if you’re installing outdoors, look for models with higher water resistance ratings and wider temperature tolerance. Indoor cameras might prioritize clear HD video and motion detection capabilities.
Size and design also matter. Consider the existing infrastructure at your location. A smaller, discreet camera might blend better into a busy environment like a bustling city street, while a larger dome could serve as a deterrent in more remote areas. Remember, the right camera isn’t just about functionality; it should complement your setup for maximum impact.
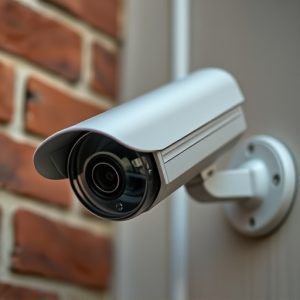
Step-by-Step Guide to Install Weatherproof Fake Cameras
Installing weatherproof fake cameras, also known as dummy dome cameras, is a straightforward process that can greatly enhance security for your business. Here’s a step-by-step guide to help you through the installation:
1. Select the Ideal Location: Choose a strategic spot for the camera, ensuring it has a clear view of the area you wish to monitor. Ensure it’s mounted high enough to deter potential intruders but still allows for optimal viewing angle.
2. Prepare the Surface: Clean and prepare the surface where the camera will be attached. Remove any debris or dirt and ensure the area is dry. For outdoor installations, consider using a weatherproof adhesive or mounting hardware designed to withstand various weather conditions.
3. Attach the Camera Mount: Securely fix the camera mount in place using the chosen method—whether that’s with screws, adhesive, or a combination of both. Make sure the mount is level and stable before proceeding.
4. Connect the Camera: Attach the weatherproof fake camera to the mount, ensuring it’s securely fastened. Some models may come with cables; if so, connect them to the appropriate power source or recording device as per manufacturer instructions.
5. Test and Adjust: After installation, test the camera’s functionality, including its view and any motion-detection features. Adjust the angle and positioning as needed for optimal performance.
Weatherproof fake cameras offer a cost-effective and discreet solution for business security. By choosing the right dummy dome camera and following a simple installation guide, you can enhance your establishment’s safety without breaking the bank. Remember, proper placement and regular maintenance are key to making these cameras an effective deterrent. With this Dummy Dome Camera Installation Guide, you’re well-equipped to take control of your business’s security and peace of mind.